Nav: (Display/Hide) - Home - About the Author / this page

Current Projects: Americana Engine (Game Engine Development)
Showing posts with label Gaming. Show all posts

Saturday, January 9, 2016

Americana Engine - Into 2016


"Glad to see it's still alive and kicking."

For months I have considered on exiting the game development market; I have previously made future plans on the basis that after my departure from AD, the game was well on its way with a new Kickstarter and a beta out at the end of 2015, with my efforts gone uncredited and my game engine completely unnoticed since its switch over to Unity.

It appears this was not the case, however, and I have chosen to resume production after looking through this month's statistics.

My career as a software developer may very well depend on completion of the game engine (as well as an optional game) and released for others to see; as many companies take working projects into their hiring considerations, I have determined that it is my responsibility to bring usable quality updates on a timely basis if I want even a remote chance at getting hired.

Upcoming in 2016: (not a complete list)

  • Porting to HTML5 - to make it more accessible to web and mobile devices, and also to serve as a means for others to present small demos without requiring the base game.
  • Possible open-source release on GitHub
  • Customizable GUI (what kind of information you can get, however, will be limited)
  • Project Website adjustments

Friday, August 7, 2015

Helixteus 2: Guide + Speed Playthrough

A year ago, there was Helixteus, which I reviewed. Now there's a sequel, and the concept of multiple universes, as well as a new building (Central Business District, or CBD) which reduces adjacent building costs and Auto-Collect, the latter which makes a quick Triangulum Probe run doable (which allows you to spawn another universe, essentially a New Game with bonuses). Since it requires very little combat (I was able to finish this without leaving the galaxy) I expect this mechanic to get nerfed back soon.

This post was since updated to cover an update to 2016 which added mining drills and made both the early game more game-breaking and pick-mining unnecessary (save some achievements).

I do not attempt to takeover all of the planets that can be seen in a supercluster because it is unnecessary and makes the game lag too much in the very late stages of the game.

Need to Know Shortcuts:

  • D = Select all tiles of that building type (or empty ground)
  • S = Click an area to start a square selection, click on another tile to end it. If you have an item selected when you are doing this, it will apply that to each building in your selection, provided you have enough of them.
  • E = Upgrade units. If you have selected multiple units, you can mass upgrade. Can mass upgrade one unit if you rectangle select only one (selection is brighter than usual)
  • Q = Inventory
  • Shift + C = Sell all ore
  • Del - Remove Buildings by clicking without confirmation

Need to Know Concepts:

  • A solar system (when you zoom out towards galaxy view) is guaranteed to spawn on top your first Solar System when a new game is started, which means that travel time there is equivalent to moving between planets in your starting system. If you leave before you occupy it your actual system will show up correctly the next time the game is loaded and colonizing it early will be much harder, especially if your starting solar system glitches and you can't fly to any other planet there. The above run relies on using this bug.
  • The price of minerals scales to a rate of your Level^(Level/6.1). If this value is less than 1/32 selling price the latter is used instead. Early game you can buy minerals with ore and sell them at a higher price than selling ore directly, until you reach around 100k, then gems will sell for better until boosts take over.
  • At around lvl 25+ you need to focus on figuring out ways to get enough storage that you can actually buy Quillite / Kyrium needed to build those end probes. Best way would be to stack Lv10 CBD with Lv1->25+ Ore Tanks (upgrading in bulk gives you less XP than one lvl at a time), combined with cost decrease research. Of course you can always mine them.
  • Overclock Boost: It existed in the last game and it's more useful here. You get a structure building, then you overclock it, then you speed it up to completion. The longer the timer the better the results. The Science Lab has no cap, but the Ore Mine / Power Plant fills it up to its storage cap... unless you have a decent CBD nearby, in which case a percentage of that huge boost will go straight into your total ore storage cap instead, it can be very useful in topping your stores many times over. (A 34-1-8 ore mine, which costs 144B to create, can be boosted x10 and gives 1.5T worth of ore before the CBD is factored.)
    • The additional resources gained from overclocking is only limited to the duration it has, so it's more beneficial to alternate between placing down speedups and overclocks of similar duration. In the above case (where the upgrade timer was 6d 6h), using 5 32hr speedup + 10x overclock instead of a 168 hr speedup will yield 7.4T from that mine alone.

Other Notes or Issues:

  • For performance, 15 tiles a tick, refresh rate 1000ms. If you are approaching larger planets, then 3000ms.
  • You can cheese the final boss by using four Supernovals on it, killing him instantly from 100%, before you should be able to. You'll skip several minigames that way but that's to be expected.
  • There is no retreat in battles. If you attempt to do so with the equal key, you'll restart the battle, and maybe freeze the game if you lost a ship that battle. Not that reloading makes a difference since you get your ships back either way, but still.
  • New universes may spawn without a single supercluster in the Universe menu, at least until you launch a few probes. This may be a side effect of fixing the boss universe bug.
  • The 20x boost on a planet (and 50x boost everywhere) gives you a boost timer but doesn't do anything. It's a good thing we don't need them since we have much cheaper alts available.
  • Speedup VIII (which costs 65T and a compressed diamond) will give you a huge amount of science points if you have something under construction - the more buildings the higher the bonus. Considering that some Lv10 techs can cost > 150P science points doing this might be necessary.
  • The battle screen enemy bar may glitch when overkilling enemies if the stat difference is high enough (A Lv68 T2 Spectre, which has 112M attack, vs a T2 Helixteus of similar level, which has 2000), and enemies will fail to disappear which will cause the wave counter to malfunction.
  • After a battle the weapon mastery and XP of the first ship gets further multiplied by the universe bonus multiplier, even though it's not listed. If you cycle ships the on the victory screen you can get that result multiplied over and over again.
  • If the XP to next level for any ship goes over 4.2 billion (which is around lvl 36 on Universe 10) the counter will roll over and can cause a ship to level up indefinitely, which is quite easy to do in later universes. You will need to close the tab and reload the game; it won't give you the cash and can't use those affected ships anymore, but you get to join the 'Highest Ship level' high score board if the game got saved and you happen to be logged in.
  • When loading a save after entering a different universe (when you have several mapped out), there's a good chance that it will black screen. It's unknown what causes this, but here's a savefile that black screens after entering a new universe, and then reloading.

Quick Guide

(As of v 1.4.1)

  • Starting Out (Before Lv5):
    • We skip the tutorial
    • Enough Mines and 1 Ore Storage (and upgrade) that you don't hit lv6 yet.
    • Convert your ore to buy materials needed to get a 200m drill and drill an empty spot. Sell your minerals from and focus on getting 1000m drills, converting cash to ore to speed this process up. Repeat this process several times.
  • Before Lv10:
    • Build shipyards + 4 ships, take over Solar System.
    • Get a planet to have power plants and focus on energy ball power to L7 once you have the cash
  • Before Lv20:
    • CBDs on center of Mines and leveled decently (> 50%).
    • Science Lab somewhere, Lv to 7, use 4x boost to get a head start. Don't go past Building Science yet. When you get the money to reach new levels, start from a fresh Science Lab.
    • Recommended build: Ore Tanks 1 planet, Ore Mines all other planets, 2nd solar system: Ore tanks 1 planet, rest Power Plant
    • Figure out a balance between Ore Tank caps (at least 100k) and what combination of Mine Level needed to top your tank storage with overclock + speedup when you boost Gem Find to 6, while still making a profit. Use excess profits to upgrade your tanks. Repeat.
    • T2 Ships and get additional planets as needed.
  • Universes 2-14:
    • Incrementing the Master Level requires leveling your universes. The master level increases the universe bonus effect, which improves the stats of everything. This also appears to have an exponential effect over the money given from defeating enemies, though ore is something different.
    • Your first universe should have a method of being able to pump out Triangulum Probe on an ongoing basis.
    • The same steps from the first universe apply, though it gets harder to buy coal with ore and sell for a decent profit since the level jumps are higher.
    • Level 10-15 on these universes is optimal before building a new universe, as this generally increments the master level by 1 (or two) each time. The quickest way to achieve this is building nothing but CBDs on these planets as they have the most XP for the cost.
  • Universes 15-29:
    • At this point 15-20 minutes per universe is doable. Green stars appear a lot more often.
    • You can't really use the selling technique anymore since the first building you put down will jump your XP to at least Lv5. Start with a Mine, and save enough to get a mining pick and start harvesting ore, which can then be sold for cash. Mining Picks are considerably faster at this point.
    • Starting enemies can be brutal, especially when your nearest solar system has rare and/or multiple stars. Start with T2 ships and train them in your starting system, and aim for systems which don't have T6-7 enemies. Use the profits to build T3 ships. Don't upgrade the shipyard past what you need since it makes buying ores harder. You can get max level weapon mastery after a few battles.
    • Up stats 75% Atk/25% Acc or so on a ship. You need the accuracy to not miss any shots, and enough ATK that your defeat them in one turn.
    • Watch your XP on your first ship, if it gets too high it freezes the game. There's some trial and error but the safe spot is 40-50G total XP per ship after factoring in the universe multiplier so go for lower XP battles.
    • You should have enough ore to buy a quillite and kyrium, maybe several thousand if you are at a low enough level. Upgrade the selling price and then sell these ores back for a nice profit.
  • Universes 30+:
    • The standard Mine/Pickaxe/14 Power Plants/Shipyard applies. Expand to two planets and then start working on the next solar system, prioritize getting energy balls.
    • I use a T1 ship on the first slot and three T3s, 75% Atk/25% Acc.
    • Class Z stars can be generated; they don't show on your stats screen until you have one on your screen. They don't generate as much as you would expect them to with solar panels, but they're good for battle rewards.
    • Very few battles are necessary to get the required 300T to advance, but the real challenge here is the ore needed to upgrade Energy Ball power to acceptable levels. There are few battles available that can be completed and not freeze the game up. If you can get them to 500G/ball, you're ok.
    • If your first ship is nearing its XP limit, build a Shipyard on your last planet and swap out your T1 ship.
    • If you can't get the necessary ore but have cash in the P range, then you can get ore storage up to a value necessary to buy those upgrades. Place and upgrade a CBD nearby first if you also need to buy materials as well.

Thursday, March 5, 2015

Battle Simulator, Beta 2

Four months have passed since the Battle Simulator in Americana Dawn was made open to beta testers, and a number of modifications and special rulesets were added to simulate a variety of real-world scenarios.

The initial wave of feedback shaped what GUI elements to include or optimize. In Beta 2, there are a number of visual and game mechanic changes, one of them including 'circles' underneath enemy units, which give a representation as to how soon they will strike and makes it easier to indicate where they are on the timeline as well.

A full list of changes made in Beta 2 is available here.

Thursday, November 20, 2014

Americana Dawn: Kickstarter

Brief Summary:

Americana Dawn is a role playing game that takes place in Colonial America inspired from the Suikoden series of games. It emphasizes more on tactics (instead of level grinding), exploration, and a variety of large scale battles.

Almost after two years of developing a custom game engine for Americana Dawn, the Kickstarter is ready to go.

Although the Kickstarter has ended unsuccessfully, it has been Greenlit on Steam so there's a good chance it will be made available there in the near future.

Notes:

  • The battle scenes are part of the battle simulator, which generates random encounters as well as showcasing new battle features. It is undergoing testing and will be released at some point in the future when the demo is out. As this is a dev created map, expect a lot of references in it.
  • The World map is explorable, though where you can go is quite limited at the moment. This region expands as we go along.
  • There will be a later post covering the various features the game engine can do in battles as there were a few things that I wanted to demonstrate, but might not be utilized to their fullest potential in the beta / demo versions.

Friday, September 26, 2014

Microbattle System, Pt 2


If Foster barely has enough HP to survive one, I wonder how he can take on two of them. (The Ruffian needs to be nerfed slightly.)

The previous post on this series can be found here.

There were many different design considerations on how the battle system should work, and eventually the second iteration of the battle system was designed, this time in a video format as well, since videos are worth a lot more than words.

The first video is to test 1v1 combat and to see if everything works. The beta next week or so will have more.

A few major changes that are in this system that wasn't present in the first:

  • Most battles have their own separate battle screen, but some (like this one) do not for added effect, particularly if those battles involve interactions with the environment. Battles in this manner may only allow equipment to be brought in, focusing more on tactics and gear setup than potion spamming.
  • Your two (or three) weapons that you bring in also determine what skills you can use in that battle, so choose carefully.
  • Attacks that interrupt no longer cancel their attack and push them back at the same time. Sure it might stun them for a bit and take longer for them to execute that one attack, but it's more of a 'what do I need to do to reduce the effectiveness of that attack' rather than a single move to cancel them all.
  • Willpower is actually a one hit point reserve after they're out of HP (down) where they can get up after a while with a bit of health. If they're all down, then pardon will work. This was needed because attacks take off considerable portions of the life bar and it's hard to get it under 20% or something without accidentally KOing them.
  • All characters regen to full after each battle so something else needs to be done to decide how various items otherwise used for healing will be used, to avoid having only one/two types of consumables in the game.

Note on Unlisted: There's a lot of internal debate about whether to keep videos unlisted or not. They have been made unlisted due to a request from KY, however I will keep them here to show proof that the game is progressing quickly towards a playable demo. (As of November 5, a battle simulator has been released to beta testers.)

Friday, August 8, 2014

Review: Helixteus


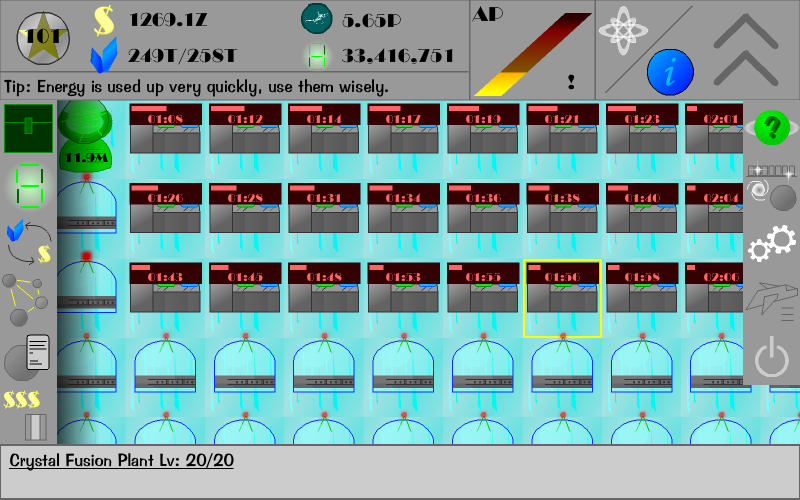
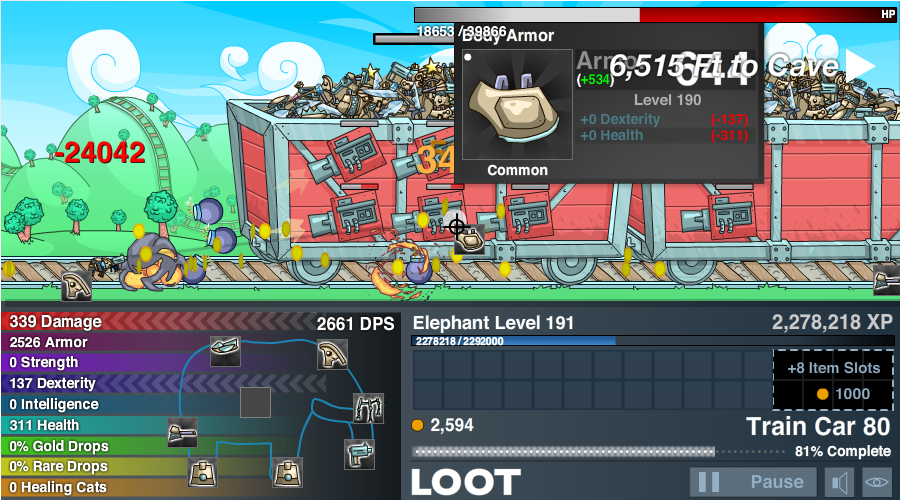
How the endgame looks like, where any basic resource you had at the start is largely irrelevant.

Helixteus is a strategy / idle space game where pretty much everything is procedurally generated (an area which I support). Except that the strategy is more like ensuring you have more powerful ships to conquer (more in reality be able to explore) planets, solar systems, galaxies, etc., and idle doesn't occur until a ways in, when research allows you to get stuff passively as long as resource generators aren't full (though the game also runs when you're not playing).

The game's over there. Review's over here based on beta v1.30, but it's still in development, so I'll give it a month to see if new things are introduced and update from there.

A sequel, Helixteus 2, was released a year later, and its appropriate walkthrough is available on this page.

GUI Interface, help, etc.

A larger canvas size might be needed since all the gui elements makes the game a bit tiny, even though you can zoom out. Some elements are a bit misleading, particularly on DirectMax (which you had to max a certain amount of that building manually before you can DM them). I don't review graphics unless there's clear flaws in them, which there aren't. And then there's the collect all (next to the blue I), where it's not even clear what it is until you click it after you researched that.

And there's some clunky mechanics regarding planet selection, naming (I see lots of Planet 0's, Planet 1's, etc. on Global Planets as more are captured, where it takes a lot of clicks to find out where each one's at in the universe. Or maybe it isn't that important) and retreating in a battle (it involves having to move a fleet to another planet first before sending that + more units to attack the planet again). They'll probably be fixed soon.

Some settings, such as time between saves, should not be set to low values, such as .5 second; should it take longer than that to save the game (and late game it will) the game will lock up and you'll probably lose the savefile.

Starting Out

  • You build an ore mine from the tutorial, convert to cash, build more, etc. Build only a few power plants, enough to get upgrades and send ships out.
  • When reaching 10 or so ore mines, a shipyard can be built, several T1 ships (and maybe to T2), and clearing the entire system. This should allow you to expand ore/power plants on nearby planets, with at least one level in path 3.
  • Remainder of the Galaxy can be accessed using T2 and T3 ships. Quantity over quality since it allows you to lay down more shots. Continue expanding, and build a handful of Institutes and upgrade main power/ore base production/storage, and rest storage only.
  • On Institutes, Overclock, upgrade, speedup, and repeat, for fast SP. Repeat for main base power and ore (L6 for now). T3 ships. Taking planets is now the majority of income for now. Idle on the planet with power plants and wait for energy balls (you do need to upgrade them a bit before they become useful).
  • Start research on collect all.

Midgame (Galaxies, Superclusters)

  • You should be able to build a probe at this point, and find at least an O star, where Solar Plants can then be built. The energy costs might be a bit high to send powerful ships through superclusters, so take a weak planet and a fleet just good enough to beat them, build a starbase there and rebuild a fleet. Stock up on XTRM specs - you'll need them.
  • The XP from the former should be enough to access some tile operations, like upgrade all and speedup all. The Upgrade All / Speedup all
  • More SP facilities and proceed through the upgrade tree. If you have upgrade all and speedup all, use them while overclocked, they give more SP than it uses. Use that to finish the science tree.

Endgame (Achivements)

Resource generation now tends to fall in these categories now using these methods (assumes you maxed out your science tree):

  • UPXP: You should not worry about this value. DMaxing Ore Storage and Solar Panels should be enough to raise it to get achievements. (Note that while DMXed panels are cheaper than their Lv25 components they are also reducing your XP gain as well so you'll need to max them manually to get the full benefit. Thankfully the time to build is much shorter each time you do that on the same planet (it might take a few minutes for the level counter to catch up). You won't be able to max solar panels until your cash flow is in the E range (the price range is actually so large I had to put the details in respective article since no one else had them).
  • Energy: Get maxed out Solar Panels near an O star and overclock to 25x. Idle here if you want to get passive energy but make sure you collect as there's no idle generation when they're full. There's up to 1000 luminosity per blue sun (more if you established them before the recent patches), so 25 x15T = 375T per hour if distance is 0.5)
  • Cash: Late game crystals sells millions of times higher (or more) than the ore itself, especially when your ratio is at high values (since its sell price also increases exponentially; at 1:259, quillite sells at ~510E cash). You'll need a planet of fusion plants since making them takes a while, even with full upgrades. (100B ore makes high level crystals consistently at a rate of 50%). The dev probably expects you to take this path anyways, as they are used for other endgame content like crafting.
  • Ore Storage: 1 DMaxed ore mine to reduce the build time, and then fill the rest with Ore Storage. Use a UT Speedup instead of finishing all buildings on planet since its fewer SP spent. You'll need the ore to bump up the Higher ore/gem value. Convert cash to ore. Buy upgrade. Rinse, repeat (you'll run in into the 'can't convert all to ore' box every time). Yes, there's a wall, but that exists at around 1:300 or so, where you need so many storage tanks to upgrade by 1, you'll probably crash the game eventually. Future updates might allow more.
  • Research Points: v1.30 makes them much more useful. If cash / energy is not an issue, which it shouldn't be, fill with Institutes, overclock 25x, and then finish construction. They only give you a Lv20, so top it off to Lv25. Then collect. On a 14x14 planet, it costs 50M to complete the above, and you will collect 768 billion SP. (Note: the SP cost for filling is 500 * (Institutes Placed ^ 2.38), and more to complete them.)
  • Exploration: Never place probes on full energy saver. You'll be waiting at least a month without speedups and most likely you'll scrap them for a faster speed one. Also for battles never use UT XTRM Spec (even though its 7x stats) since its SP cost is exorbitant for large T5 fleets, which you're probably using them on.

    An interesting note is that even though the probe's speed is set to one over 9000, any other ship can exceed that at this point in the game.
  • Taking Late Game Planets: When the difficulty rises above 500M, you'll start having mobs with at least 10T HP, 1T atk, 1T def, etc. Builds focus on only two things: Being able to stunlock and having enough HP to survive the battle while tanking. Although rocks might be worthless with atk and def (smaller ones are worth no more than one or two spec points each) you'll need as many as you can to boost HP. Fleets with at least 300T HP, 350T attack, 15B defense, and 50k ships are required to have a chance of surviving here.

Saturday, April 5, 2014

Gemcraft: Chasing Shadows Strategy - Turtling


The two gems do a max of 1k damage (0 on these swarmlings), but it's the orb that cleans them up.

Note: The damage boost on the orb was removed a day after it was released but I'll still leave this post up here for historical purposes.

The new Gemcraft Chasing Shadows is finally out, and after a few hours found a viable strategy to power level early game. They added quite a bit of new features, including dropping gems on your orb to increase its damage done to monsters (before being banished). Which is specifically what this post will cover here - turtling.

It works wonders on levels with lots of swarmlings (B3 being a notable example), where they have low hp and you can anger them a lot to jack up their XP. And even more if you spend shadow cores to up traits Haste and Beacon Storm (the latter giving you free XP if the map doesn't spawn any).

  • You're gonna need a bit of mana reserves for this one (be at least lv10 first). Level up Fusion and Mana Storm as high as it can go, and True Colors when you unlock it. Getting bunches of Achievements will help with this one.
  • Create a grade one gem, drop it on your orb to increase its damage, until it's minimum damage is at least the hit points on the first few waves. Use red / green if possible, since they grant more minimum damage on the orb. If you have spare mana, you can repeatedly balance betwen angering the next few waves and upping the orb damage.
  • Start the first wave - the first pack of monsters should hit the orb and die instantly granting you mana.
  • Use that to keep upgrading your orb damage to keep up with the increased hp in later waves. If your mana's near full let it level up first.
  • If there are giants on the field, you have more than enough mana to create high grade gems and have them specifically target Giants (Bolt is useful here). Don't use anger on them - they don't give out enough XP anyways.
  • One you see the last wave and no giants are there, you can use high strength gems to upgrade both the orb and incoming monsters. (Higher grade gems dropped to anger them uses up more mana, but it has a larger XP multiplier and more monsters compared to a wave angered to the same HP with low grade gems.)
  • Plan appropriately if there are some special conditions you need to meet to complete the stage (like wizard tower levels)

Angering them enough times gives enormous amounts of XP and causes their armor to go through the roof (several thousand when angered enough), but as long as your minimum damage is a bit under their HP, it's no bother since the orb usually one shots them. If they don't they get another pass but it's not like they'll survive the second time through. The number of beacons on the field don't matter, as it doesn't stop this strategy from working.

Considering that it nets tons of XP (as in tens or hundreds of thousands) in the first few map tiles, and that it detracts heavily from its intended purpose of the game (it allows you to complete maps without placing any gems in towers at all), it might be nerfed in the future.

Sunday, January 5, 2014

Glean 2 Crafting Guide


It's still complicated, though not as much as the first game.

Brief crafting guide summary for Glean 2, most crafting data pulled from Glean 2 Guide Wiki, which is actually more like a guide than a walkthrough. But a few notes on on the above diagram:

  • The icons on the top-right indicates what resources are used to craft a certain item and component types. You'll need to have one of the respective blueprint and one of each of the material you are crafting before you can make more.
  • Exact number of resources for crafting a certain item are not displayed here, since it might change between patches, and you'll probably be mining enough that it doesn't matter.
  • Exact components needed for upgrading are not displayed since it requires another image to display all 112 upgrades in the game but upgrades for a certain part use components from only four categories, if it makes it easier.
  • Modular and Mechanism components on the bottom has a number indicating minimum depth needed to find the resources needed to craft it, and require two blueprints to research it, which vary between items. Assuming you already researched the four individual components used to craft it, that is.
  • Depth which gas is found is rounded to the nearest 50 depth (like 0-50, 50-100, 100-150), but are displayed as multiples of 40 for the purposes of making the table compact.
  • There's a chance that Bacteria can spawn above 140M in Aquatic areas, and lava was seen as high as 130m.
  • Uranium is mined from an empty lava pocket.

The tips below are general strategies for maxing upgrades in under 50 planets (the time limitation of the preview):

  • Mine everything that you can get to.
  • Fuel Reserves, Repair, and Radar Pulse are the only useful things to craft. Don't get Oxygen Refills since you'll need the Water for upgrades, and only Water appears from Chests, and they only appear once at a certain depth. Everything else is late game.
  • Find the chests before you leave a planet, since they contain 2 (or more) blueprints each.
  • Focus on Plating / Propeller / Cooling first, as they determine what you can mine, then Item Caps, Resource Quality, and maybe Drill Vibrations, as they don't require modulators / mechanisms. Optics is unnecessary as you can craft Radar Pulse fairly early, which does exactly what a high level Optics upgrade gives you.
  • You will have to get lava pockets and Uranium even though it's below the safe zone based on the best equipment you can get at the time. I suggest you get some repair nanites, do just enough to get the lava and uranium, and make a run for it.
  • In lower depths in Aquatic areas, look for oxygen bubbles coming out of the ground and not from sea grass? Those are locations of Coral Shards.
  • You can grab an unlimited amount of Unstable Isotopes and Oxygen by lingering next to a Aquatic chest at low depths.

Sunday, November 17, 2013

Crystal Story 2: Skill Guide

Here's a list of all the skills for Crystal Story 2 for each character (as of v1.20). A character can pick two specializations for each class tier, and a third after two Class V specialization trees are completed (after around 365k SP total), as well as a fourth specialization at 1.1 million SP, although by this point it's mainly for upping your stats.

D has Slayer I selected at the start of the game, Lina has Thief I, and Mari has Elementalist I.

D Class I Class II Class III Class IV Class V
Base SP Cost
(per Node)
25 / 40 120 / 210 560 / 840 2000 / 2400 3600 / 3600
Slayer Fire Attack
Bash
Frost Attack
Cleave
Barrage Shockwave Berserk
Guardian Guard
Attack Up
Attack Down
Magic Up
Magic Down
Recovery
Attack Up All
Transfer MP
Concentrate
Attack Down All
Magic Up All
Reinforce
Thief Throw Burst 1
Steal
Quick Attack
Flee
Hide
Haste
Throw Burst 2
Sprint
Pilfer
Blur
Throw Burst 3
Quicken All
Elementalist Fire I
Water I
Lightning I
Earth I
Flame Wall I
Blizzard I
Storm I
Quake I
Fire II
Water II
Flame Wall II
Blizzard II
Fire III
Trickster Armor Down
Poison
Silence
Sleep
Blind
Spirit Down
Slow
Poison All
Silence All
Sleep All
Spirit Down All
Armor Down All
Slow All
Blind All
Healer Heal
Cure
Armor Up
Spirit Up
Raise
Heal All
Regen
Quick Heal
Armor Up
Spirit Up All
Raise All
Greater Heal
Auto Raise

Lina Class I Class II Class III Class IV Class V
Slayer Earth Attack
Bash
Lightning Attack
Cleave
Barrage Berserk Shockwave
Guardian Guard
Attack Down
Magic Up
Attack Up
Magic Down
Recovery
Magic Down All
Transfer MP
Concentrate
Attack Up All
Magic Up All
Reinforce
Thief Throw Burst 1
Steal
Quick Attack
Flee
Sprint
Quicken
Throw Burst 2
Pilfer
Hide
Blur
Throw Burst 3
Quicken All
Elementalist Earth I
Lightning I
Water I
Fire I
Quake I
Storm I
Blizzard I
Flame Wall I
Lightning II
Storm II
Earth II
Quake II
Lightning III
Trickster Armor Down
Poison
Silence
Sleep
Blind
Spirit Down
Slow
Poison All
Silence All
Sleep All
Spirit Down All
Armor Down All
Slow All
Blind All
Healer Heal
Cure
Armor Up
Spirit Up
Raise
Heal All
Regen
Quick Heal
Armor Up
Cure All
Raise All
Greater Heal
Holy Light

Mari Class I Class II Class III Class IV Class V
Slayer Lightning Attack
Earth Attack
Bash
Cleave
Barrage Shockwave Berserk
Guardian Guard
Magic Up
Attack Down
Attack Up
Magic Down
Recovery
Magic Up All
Transfer MP
Concentrate
Magic Down All
Attack Down All
Reinforce
Thief Throw Burst 1
Flee
Hide
Quick Attack
Steal
Throw Burst 2
Sprint
Quicken
Pilfer
Blur
Throw Burst 3
Quicken All
Elementalist Fire I
Lightning I
Earth I
Water I
Quake I
Flame Wall I
Storm I
Blizzard I
Fire II
Earth II
Flame Wall II
Quake II
Earth III
Trickster Spirit Down
Poison
Silence
Armor Down
Slow
Blind
Sleep
Spirit Down All
Silence All
Sleep All
Blind All
Poison All
Slow All
Armor Down All
Healer Heal
Cure
Spirit Up
Raise
Armor Up
Heal All
Regen
Quick Heal
Cure All
Spirit Up
Raise All
Greater Heal
Regen All

Kaz Class I Class II Class III Class IV Class V
Slayer Bash
Cleave
Frost Attack
Lightning Attack
Barrage Shockwave Berserk
Guardian Guard
Attack Up
Magic Up
Attack Down
Magic Down
Recovery
Transfer MP
Attack Up All
Concentrate
Magic Down All
Attack Down All
Reinforce
Thief Quick Attack
Steal
Throw Burst 1
Sprint
Hide
Throw Burst 2
Flee
Quicken
Pilfer
Blur
Quicken All
Throw Burst 3
Elementalist Lightning I
Water I
Fire I
Earth I
Storm I
Blizzard I
Flame Wall I
Quake I
Water II
Lightning II
Blizzard II
Storm II
Water III
Trickster Silence
Blind
Poison
Sleep
Armor Down
Spirit Down
Slow
Poison All
Silence All
Sleep All
Blind All
Armor Down All
Slow All
Spirit Down All
Healer Heal
Armor Up
Spirit Up
Cure
Raise
Heal All
Regen
Quick Heal
Cure All
Spirit Up All
Armor Up All
Greater Heal
Holy Light

Notes:

  • Base SP Cost only displays the cost of learning the first two specializations, and rises as you go though the skill path. Skill cost is 1.2x base SP. There are 20-23 stat increasing nodes per specialization, and the amount of stats gained from a node varies slightly per character.
  • Anything in cyan are skills unique to the character.
  • Fire Attack, Frost Attack, Lightning Attack, and Earth Attack deal elemental damage based off the ATK stat instead of the MAG stat.
  • Guard, Recovery, Concentrate, Berserk, and Reinforce targets self.
    • Guard: Reduces the damage of next attack by half
    • Recovery: Casts Regen (late game this is pretty much useless)
    • Concentrate: Gives ATK Up and MAG Up
    • Berserk: Gives ATK Up, MAG Up, and SPD Up
    • Reinforce: Gives DEF Up and MDEF Up
  • Throw Burst 1, 2, 3 are the only skills which allow you to use offensive weapons in your inventory.
  • Hide prevents enemies from chasing you when used on the field map for a while (you can still start an encounter if you run into an enemy), and Sprint doubles your movement speed on the map.
  • Lightning actually inflicts Wind damage. Don't ask why.
  • Holy Light applies Greater Heal to all allies.
  • Auto Raise gives the party Auto-Life status, fixed in v1.3.

A good strat would be to get a dedicated buff/debuffer with high speed with the Start SPD accessory (one is obtainable after completing Mercenary Defense Lvl 3) to allow multiple turns at the start of battle to buff the party's defenses and speed, and the other party members for offensive attacks and possibly debuff the enemy.

Focus less on stat gains and more on desired skills when deciding what class to give your character. When choosing between two stat gains always go for the HP/MP increase, since the other stats are easier to get via equipment + upgrades and the only increases to DEF or MDEF are accessories or buffs (in the latter case it's a 25% damage decrease). Bosses (and many enemies scaled up when Wanted X Quests / Hard Mode is activated) are capable of one shotting you / entire party otherwise, sometimes before you can even make a move.

I don't have exact specifications at the moment on how many of each upgrade are present when going through each class specialization. The table might be more useful on the wikia for this game, but the visual graphic that will soon replace the above tables will remain here.

Friday, May 24, 2013

The Candy Lei Problem


The board under varying degrees of Candy Lei. Players will never see balls roll out in the way shown on the third screen.

This week's board (previously called Summer Solstice) faces a few problems due to the board design, most notably regarding Candy Lei (and any other food that creates bigger clusters.) The fanpage hints that this is a tough board this week and mentions that the Candy Lei appears to be working, but many people disagree. So what's the real problem here?

Difficulty Adjustment: There are several ways that difficulty can be raised aside from the curve design. As boards in Blitz use the same curve file structure as in Zuma's Revenge, the difficulty can be raised by either increasing the max number of singles that pop up in a row (offset 0x15), the number of colors the curve will produce (offset 0x19, max 6), or other features like max cluster size and speed of balls (offset unknown). The balls generated are not completely random, instead the color of the ball is based on whether or not it meets various criteria in the previous sentence.

Note the difficulty applies for a single curve only, and there are two curves that are loaded in Blitz, so the difficulty for each curve can be adjusted independently.

Problem: The Candy Lei makes clusters bigger by reducing the number of single balls that can appear in a row (it also increases the chance that clusters are bigger, but only marginally). Under normal circumstances after a ball has rolled out, if the next ball isn't the same color as the previous ball then the ball after that must be the same color. The Candy Lei ensures that no single balls roll out at all. However this board allows up to two singles to roll out in a row, so a Candy Lei would set the board to the difficulty found in past boards without the use of Candy Lei. The noticeable change is minor when multiple single balls are allowed to come out in a row, but is major when they cause singles to be non-existent. The huge difference is causing people to believe that the Lei is not working.

How to resolve: The Candy Lei effect either needs to be made stronger, or change the difficulty that fewer singles roll out.

Strategy: I would normally suggest using a Spirit Turtle since you can chain hot frogs together and can clear balls / reach fruit no matter how jumbled up they are, but they banned it and 99% of the players do not have access to a turtle. Unless you are an expert with making gaps, I don't have good tips otherwise, so all I can say is good luck.

Friday, March 15, 2013

Starcraft 2: Heart of the Swarm - Speedrun Version

An attempt at completing each mission as fast as possible on Normal Difficulty. Unlike Wings of Liberty, there isn't an achievement for doing a speedrun of the campaign. (Although there are more achievements for completing certain levels under a certain timeframe, listed under the 'Mastery' category, they won't be covered here.) Too many people were doing playthroughs on Hard / Brutal and I wanted to try a different approach.

Replays will be published somewhere between now and by the end of the month, and this page will be updated / links will be posted as they are uploaded.

Notes:

  • All of the maps are played using Master Archives game mode, since it allows me to configure units to work the best for specific maps without the need for multiple playthroughs, and some levels are difficult or impossible to speedrun otherwise before that point.
  • Demos were made on WinXP, the sound quality is reduced a bit. There's also a performance hit on some maps especially with a large amount of units onscreen, but it shouldn't matter much (I have a GTX 670 and i7 2600K, so it isn't the card...)
  • I tend to go for econ over rushing as it tends to help in the long run in most cases.
  • Evolution missions are not counted.
  • Maps with no links to videos are ones which I am attempting a faster run at.
  • I will attempt Brutal difficulty speedruns of this campaign at a later date.

Other Thoughts:

  • The new settings with the expansion has 'select neutral or enemy units' toggled OFF by default. If it's on, it will explicitly tell you that you can't control the unit when you select it (which is kinda annoying, since you probably knew this beforehand). I find it helpful to check stats of enemy units and such.
  • I don't need tips from Izsha reminding me to get anti-air, telling me I don't have three drones on a extractor, etc.
  • Some game elements were changed only for the campaign without too much explanation. None of your units except Spore colonies have detectors, but it's not like you need them since enemies don't cloak and nukes aren't fired using ghosts.
  • The infestor's neural parasite is equivalent to a DA's Mind Control only in the campaign. Combine that with Consume and it can control a lot of the enemy army quickly.
  • Some other key units like Nydus Worms are unavailable, transports can't be made to ferry units around, the only upgrades you can research in-game are weapon/armor upgrades, and the cap for larva at a Hatchery is much higher, making this a non-representative multiplayer SC experience.

Individual Level Notes:

Lab Rat

  • Fairly standard build, though a large enough force was needed to go through w/o reinforcements.

Back in the Saddle (around 17 mins)

  • The map was fairly linear here, so there's not much to optimize in this level.

Rendezvous (15:59)

  • Note that this mission has a fixed timer - you are forced to wait for reinforcements to arrive before you can attack the main base since the bridge isn't lowered before then. The best you can do is to destroy every building on your side (doing this on Hard gives you an achievement) and camp at the other end of the bridge.

Domination (3:37)

  • Kerrigan's Dash move works well in collecting those eggs at the start, and she's healed to full after collecting them. Note all the units you have control over is guaranteed to cause lag.

Fire in the Sky (7:52)

  • Although tumors were used to expand and such, having a drone to build a Hatchery near each nest that doesn't have creep and then using a Queen to put a tumor in place is much faster than spreading creep slowly towards the nests. Although it seems nice to activate all the nests at once, there's a delay between the time one battlecruiser gets destroyed and another one pops out.

Old Soldiers (8:29)

  • After several runs through the map it was concluded that Swarm Hosts work the best, since the locusts also draw fire from the base defenses. The drones that get dropped when you defeat the base with Rich Mineral Fields doesn't matter much.

Harvest of Screams (4:46)

  • If you have the Zergling speed and Raptor upgrade, it becomes possible to destroy all three spires before the first flash freeze passes, Kerrigan destroying one single handedly with Banelings (the ones that she summons do 160 damage each with the right upgrades).

Shoot the Messenger (3:24)

  • Note that Kerrigan's Leap ability will work leaping on cliff edges IF you have vision, so an overload was used for a spotter. Summoned banelings have a 90 second lifetime, the cd to summon is 30, and you need a bit more than 6 to destroy a bay, so two summons were used for each bay. The last bay was a one summon + damage from Kerrigan for the win. Note that harder difficulties places additional units near the bays and you can't use a cheese strat on one of them since they will kill most of the banelings before they can explode.

Enemy Within (11:24)

  • The level is fairly linear and you'll have to kill everything here (some areas release units on a fixed timer) so there's not much to optimize for the map, other than decreasing the time it takes to destroy some generators using some increased speed Zerglings.

Waking the Ancient (7:27)

  • The enemy only sends out units to attack the first drone that started harvesting, so you can safely harvest a few of them in the same area without worrying about drones being killed. After that (when the other locations are revealed, or the 3:40 mark, whichever comes first) the computer only specifically sends a wave of units after harvesting a specific location, and two mutas + guardian on the others. The ETA that enemies get to them is at the 40 second mark, so you could be defending other locations when harvesting starts. Destroying them allows you to safely move on; while the drone is unprotected there usually won't be more forces coming after it.

    It's similar to the SC2 Map 'Welcome to the Jungle' except the boss at the end.

The Crucible (around 26 min)

  • This level also has a fixed time limit so there's not much in terms of speedrunning this map.

Supreme (7:01)

  • The reinforcements that you pick up are automatically teleported to you when boss battles start and Kerrigan is healed to full when the boss battle starts and ends so there's no sense fighting between bosses.

Infested (7:57)

  • Infestors work well on this map. Ignore the first virophage being attacked, it's not necessary to win.

Hand of Darkness (19:09)

  • No comments yet.

Phantoms of the Void (13:12)

  • No comments yet.

With Friends Like These (10:13)

  • No comments yet. I've heard of a 8 min completion time so this is definitely not the fastest.

Conviction (7:47)

  • The first half requires that certain or all units must be destroyed in an area in order to advance, so there wasn't much in time optimizations here. Other than that I had units pick up the pace by constantly attack moving.

Planetfall

  • This is actually a scripted mission based on the timer, so a speedrun can't be done on this map.

Death From Above (7:41)

  • Dehaka can rush directly into the generator and destroy it without being killed, saving some time in the opening. Near the Psi Destroyer, if you have enough infestors you can mind control every strong unit defending it and take it down before the field powers up. (Normal mode has 1500 HP, Hard and Brutal have 2500)

The Reckoning (13:43)

  • The quickest solution to winning was to pump out Infestors as fast as possible and neural parasite (mind control) every unit in range. Problem was the energy cost (125). Consume worked to a certain extent, but left units injured. The best solution was to MC medics, consume hp from other infestors and convert them to energy and work on mc'ing other units while the medics heal them.

Sunday, January 27, 2013

Americana Dawn: Programming Standpoint


First Challenge of the month: Making sure the music from the composer can be played in the game.

The general game flow is mentioned in this post in Bit Bonton.

It was 18 months ago that I made a mention to Americana Dawn, and maybe longer that I was aware of it. In recent weeks, I was asked to help out with the project, which I accepted.

The demo was originally set for July 4 2012, but this was pushed back. Twice. The Kickstarter for the game was successful, but the game went way over budget.

After choosing to commit, two things were realized: One, I can no longer do a review for this game - after all, I am part of the team that makes the game, so I could essentially add features that I would otherwise say in a review as 'not present in the game', and work my way towards an ideal highly rated RPG. Two, this occupies the timeframe of a standard 3 or 4 unit class (has regular meetings, building the game, etc), and the term project for this one is... the completed game (by Apr 28) so I'm in for something new. Like an intern position for an game company, except that pay is based on how much people donate*.

The last time I remember programing something of this depth was three years ago, where my entire class worked on an airplane simulator, and it became the class term project. (It ultimately didn't reach completed status). It's like this now - only it's just me and whatever reference manuals I can find on the internet.

My experience with programming the game will be described in several posts over the next eight months or so, and will fall under the Americana Dawn category.

The App Planning Stages

The requirements for the app were the following (updated as I go along):

  • 16-bit style RPG
  • Keyboard controlled (I may add mouse support of people ask for it)
  • Linear gameplay (although it will be open world to some degree and may have sidequests)
  • Dynamic music - ability to change out music on the fly based on location and on-screen events.
  • Be able to handle various environmental effects as well as support large map sizes
  • Complex Large Scale Battle system (sometimes handling hundreds of units in a single battle at once)
  • Deep storyline and character / gear progression system, and ensuring there isn't any excessive grinding.

The program was originally generated using RPGMaker using multiple scripts to handle custom features like pixel (instead of grid) movement and battle systems, but the engine was not geared towards many of the heavy modifications this game would otherwise require, especially the sound and larger character sprites. So I'll have to build a custom engine for this one.

Wednesday, January 16, 2013

Thoughts on the Diablo 3 1.0.7 PTR


200k to craft one of these. Hoping for good stats.

I decided to test the Diablo 3 PTR within an hour after it was announced. The use of more gems to create those elite Marquise Gems caused gems of all types to skyrocket (This is the first time I've seen every gem cost over 2000 now, I wish I bought a lot of them earlier.), and I wanted to see if those new items were worth it.

Thoughts on the PTR:

  • It seems like elite mobs spawn more frequently and creatures drop more. Where it was hard to get five to spawn during a Arreat Core Lvl 1 / Tower run, at least five elites appeared to build up the NV quickly and that only appeared before I finished the map. I'm guessing because they want testers a chance at grabbing those DE's to test out the new plans.
  • During a single run during the PTR, only two Demonic Essences appeared per run. 20% seems fair enough for MP0, given that you only encounter less than twenty per run. Plans might drop too often when farming minibosses and would be much cheaper to buy from the AH instead than from the vendor (1.5 million gold).
  • The undocumented feature of identifying items when selling to vendors: Previously all items had to be identified before selling - now when you're on the sell item screen instead of being unable to sell you will identify it instead. I like that change.
  • Plans drop too frequently now (5x as much - I found 7 plans within the first two hours of play, two exalted, the rest plans released in the update) - expect those prices for each legendary plan to go down a bit. The plans to create account bound items are sellable, though trades are the only way to do that at the time of writing.
  • Marquise Gems are underpowered for 80 million... or more. In short, they're not worth your extra gold and you should buy an equipment upgrade instead. The Ruby does +150 to damage - even though it might sound large, it's still less than what a crit damage might do on a Lvl 60 hero, when they're focusing on getting the most dps as possible (which means going for high crit chance and damage)
    • The only reason why the Ruby would be the only thing worth buying is that it greatly increases the damage potential of pets or alts - making any hero under Lvl 50 overpowered (When you first find a weapon sockets at lvl 15 or so, you'd be lucky to get 50 dps on it).
  • The new crafting recipes? Item level 63, 1 main stat guaranteed at up to 15% more than possible (by that, in the range of 200-215) and 5 random stats. For each of the main armor parts. 100k to craft, and more for the ingredients (total 200k or so to craft one). Also, they're account bound, so you can't sell on the AH. Have fun. (This, I believe, is the closest they have gotten to gambling in D2)

Saturday, December 29, 2012

Two Weeks into the AH: Flipping Amulets (and other goods)


A large warehouse of gems and other components ready to craft and sell.

Another week goes by in the AH and I've at least doubled my asset values (at around 75M). It makes any gold farming in D3 seem rather trivial at the rate which gold is gained from flipping items. (I had to split up my time between D3, programming, and other FB apps, as well as checking the newsfeed manually, since the undocumented RSS feed that gave me daily digests of friends' status messages over the last two years was taken offline.)

In addition to gem selling, I've resorted to flipping amulets this week because of several traits that make it unique. First, the caps for attributes go much higher than usual, and second, they can also be fitted onto followers and have no class restrictions. The first reason makes them valuable as key attributes approach their max values on ilvl63. There are occasions where some valuable amulets are auctioned off for under 100k, and sold for much more.

Note on image above: It doesn't look like I have made a lot compared to last week, but keep in mind: I do have 220+ more Perfect Square gems ready to craft or sell (in case a high point rises in the market) and filled all my slots with valuable gems and TOS, which values to at least 15M+ here. There's also five Star and Flawless Star gems being put on auction in the RMAH as well as a 160+ STR and VIT Depth Diggers.

What to go for in the GAH (Amulets): Anything with two of the following attributes:

  • Gold Find > 30%
  • Crit Chance > 7%
  • Crit Damage > 66%
  • Attack Speed > 6%
  • Any Main Attribute > 303
  • Magic Find > 40%
  • Resist All > 60

Note on Flipping (in detail): Best to research the lowest cost of an item with those attributes before starting to make your bids/buyouts. You may want to keep track of how much you paid, and how much you listed the item as, so you can decrease its if it fails to sell, as long as you break even.

If you want to flip Legendaries, keep in mind some items are slightly more profitable to sell on the RMAH. Stormshields with good stats (at least 200 STR and 100 VIT) tended to sell well at 1-2 bucks profit a piece - and they were bought at 1mil or less. Block percent was irrelevant. You could try this for gems for a nice profit (as high as 70% ROI at the time of writing), but they sell a lot slower, and you need more of them before you can put them on the market.

Friday, December 21, 2012

One Week into the AH: Diablo 3 Auction House Tips


This gem commodity looks like a good sell - better produce them before the selling price goes down. (Today's deal: Perfect Square Rubies - between 5-7PM PST producing 28k gold per gem produced)

I've heard from one of my friends that he was able to sell off $600 worth of gear after quitting. Wanting to try the same, I got my copy in December. I realized a lot has changed in seven months since the AH was first available - gold is a lot less and you can't profit from gems. Still, I manage to find ways to profit from this economy, despite the fact that making good money here is nonexistent at this time (at least until PvP comes out). Within two weeks (one was spent building up my character to 60), I have approximately 36 million gold in assets. Most of it was not from gold farming.

My Tips for Profiting and getting the most out of the D3AH (updated Jan 2013):

  • Find cheap legendary items with good stats (under 1M) and sell them back on the RMAH. You should research the average price on both the RMAH and the Gold AH beforehand. For anything less than 1M, selling for two dollars is sufficient enough to cover the costs (this equates to > 3M gold at the time of writing). They don't sell often, but when they do they pay well.

  • Upgrading your gear: Typically the three most important attributes that you want will give you cheaper costs than you expect. The highest stats are typically (but not always) the most expensive. Something like 20% less stats could be much cheaper. It took under 5M in gold total to upgrade my Barb to 96k dps, while still being able to survive Inferno, only one item bought was 1M.

  • Basic Stuff on Auctions: The auction runs on a proxy bidding system - only the second highest bid is displayed. If you place a bid, and it doesn't beat the other person's max bid, it will show your bid, since the system automatically bids for them in 5% increments (up to their max bet). If you win the auction, the cost is what the second highest bidder put down (the difference between your max bet and the actual price is given back to you via a refund).

  • Pinning Auctions: When you place a bid, whether you win or not, it will be pinned in the 'active auctions' category (even if you don't win) so you have a chance to bid again closer to the auction end time.

  • Bid Sniping: Place a large bid (up to what you want to spend) seconds before the auction ends). You'll want a watch with a second hand to do this. A well timed snipe almost guarantees an instant win. If not, you at least raised the cost of the item for the person who won. Tip: Copy your max bid to the clipboard and paste it in to bid faster. There is a few second delay before your bid is actually placed. (Note: The time before auction ends doesn't refresh on your bids until you scroll down, and in results until you search again or flip through pages)

  • Mass Bidding: If you see a lot of extremely cheap items with a few hours left to go and are not planning to be on the auction house at the time it ends (like 2AM-7AM) don't be afraid to put a larger bid on those items. (ex. if the item is worth 1M and the cost is below 500k, place 500k bids on all cheap items that end during that time). If they don't win, you'll get your gold back.

  • How Selling Works: If you want to list an item, for equipment the suggested bid cost is the sell price of the item, with the buyout left blank. For commodities, it is the value of the Last 10 Trades (this can be manipulated - see below) and is your sell price. They last for 36 hours either way, and the item is returned to you (or for commodities, what you didn't sell, as well as gold for what sold).

  • Bid or Buyout? You have two options for selling items: You can either set a decent buyout price, or have the people build up the price for you via bids (it is recommended you start your bid at the price you originally paid for it, plus 20%). This avoids the 'too high, didn't sell' situation.

  • Flipping Items: It is very possible to flip items for a substantial profit, especially when it comes to amulets (and rings). Anything with a 45% gold find should sell for at least 500k, and even more with a good crit chance/dmg. However, you can only have ten auctions active at one time, so you'll need to do a tradeoff between high profits and faster selling. My strat would be to keep two items selling above 1M, seven in the 300k-1M range, and one for something else (like gems or TOS). There was one instance where I bought a 3M amulet with a good crit chance / dmg for 3M and proceeded to sell it for 5M.

  • Flipping Gems: This is faster than item flipping, but although profits are significantly lower per gem sold and makes up for quantity, you'll have to spend a lot of time clicking to craft each one (if you have a laptop, you can read some articles to pass the time while you're crafting away with your other hand). Input the prices of all grades of a gem color you're interested into a gem calculator of your choice and TOS costs (mine above was built from scratch). Buy gems and craft them up to the level where the most percent profit can be made. If there's any higher grade gem with a -17% or lower profit and a higher level gem has over 4% profit, buy that grade instead as it saves the time used to craft that gem, (if the estimated price is below -15% profit, buy as many as the AH will allow, but read the footnote below)

  • Commodity Supply and Demand: The supply and demand system works a bit differently for commodities at the AH. The 'Price per Unit' is the maximum amount of gold you will pay for a single item. The reason why the supply of trades goes up is because if gems are bought faster than they are listed, eventually the buying price will be higher as supply runs out, based on what people list their gems as. (Some testing with buyout values indicate most of the time less than 3000 perfect square gems of a single color are in the market at one time, and less than 1k gems with a grade of Star or higher are being sold.) The only reason why prices goes down is that people want get their gems sold first, and they try to price competitively. When two or more people are in a price war, the selling price for a gem can go down quite a bit (for a Perfect Star Ruby, 6.8 mil -> 6.5 mil)

    (The 'price wars' are more prevalent when it comes to plans in the RMAH, as there is a huge price difference between the GAH and RMAH when you do the conversion, typically in the millions for a single plan. The most I've gotten out of one trade was 22 million gold profit from selling a Demon's Skin Plan for 15 bucks... after buying it for 32 mil.)

    • Example: 100 P Square Ruby gems are selling for 40k. 50 others list for 45k, 20 for 50k, and 10 for 60k. The avg last trades are 40k.
    • Without doing any additional research, people will usually craft P Squares and list for 40k (at a 1k profit per gem made), although most guides indicate you can't make such a profit, with a large enough stockpile of gold you can on average make more gold per hour from crafting than you can with gold farming.
    • Suppose no new gems were listed and 100 people buy gems. Price per unit (PPU) is raised to 45k. Last 10 trades remain the same.
    • 5 more people buy it and the PPU is still 40k... but the avg last 10 trades is now up to 42.5k for future gems. People may sell for a higher price as a result.
    • 52 others buy and the price is raised to 50k (avg at 48k). At this point the profit margin is 30% for each gem made and now the market floods with gems from buyers hoping to get a profit.
    • The average sell price gradually drops as people are pricing their gems lower than the average in order to get theirs sold first. Others may pull out their original offer and price it down to below their average too, especially when selling large amounts. The average price goes down to 35k or so (at this point they are losing money from these sales)
    • Some people buy these gems seeing the costs are lower than usual)
    • The cycle repeats.

  • How price manipulation works: In the above example, if they are selling on average at 75k, and a few people plop them down at 30k, and two are sold, then the average becomes 66k. Unsuspecting sellers who didn't do the research may sell at the new price, bringing the price down faster than usual. In markets where people are accustomed to buying in bulk (like Tome of Secrets). more may be required to bring down prices, and the lower average price needs to be kept down constantly or the commodity price will go back up to normal prices. Conversely, others can be tricked into buying bulk at regular price thinking it was a good buy), which can raise the price up, at which point sellers can profit.

    Price manipulation has been typically seen on Tome of Secrets and Flawless Square gems (by setting a extremely cheap price (such as 100 or less than 50% of the current trade price) to reduce the average trade price - this can be seen when you query the price for buying a gem/TOS and it has a large price variance between the average cost and the estimated cost. They are rarely seen in Perfect and Radiant Square gems and almost never seen in grades higher than that due to the fact that they are much more expensive (they are crafted by players for a substantial cost and do not drop in the game) and are resistant to dropping below the production cost of the gem (cost to buy flawless squares + TOS + crafting fee + 20%) for obvious reasons.

  • Quantity or Quality? When crafting gems, analyze your percent profits, and sell the gem quality that clearly has a higher margin of profit. If the difference is small, it would be better to sell off the highest grade gem you can afford. However, the selling rate for gems drop off dramatically (it takes around 2-3 minutes on average to sell a Flawless Star Gem, 10-15 mins for a Perfect Star Gem, and around 2 hours for a Radiant Star Gem) so you'll need to find a balance between the two.

    People don't typically buy gems higher than Flawless Square in bulk because there is no profit from crafting at that point, so people usually buy one to socket it with their character. As a result, it would generally be better to sell a Flawless Star Gem at 8% profit rather than 9 Radiant Square Gems at 10% profit. After that point (like Perfect Stars), players are a lot less willing to pay the extra 6 million for a marginal increase in stats (+4 of a main stat) and instead go buy some better gear with this (I, in my opinion, would rather get a IK Eternal Reign for 10M than a Radiant Star.) However, with the future introduction of the next tier Marquise Gems (with a base crafting cost of 85 million, minimum, if you bought all the materials to craft one at current market prices after the 1.0.7 preview post), gem stats might increase dramatically.

    If you don't have a large stockpile of cash, resort to the JIT (just in time) strategy by buying gems as you finish up your order, unless you know the price of a crafting material will increase greatly. Else you might end up with a huge stockpile of gems you can't sell (I had 200 Perfect Square Topaz gems ready to sell, and then the market dropped to the point where I was going to lose money if I sold it at that price...), and had to do a bit of gold farming to get more gold for other ventures and to craft them into higher grade gems.

Good luck in the markets, and remember it might take a bit of time to build up a huge fortune, but you'll get there.

Footnotes:

  • Price Per Unit (PPU) refers to the upper bound that you will pay for each unit when you click the search button.
  • Buying commodities in bulk warning: When you buy a commodity, you will buy out the lowest priced commodity currently on the market. If the estimated cost is higher than what you will buy it for, then the transaction will fail. Note that the support site / game does not cover 'in between cases', so if you buy enough of a particular item so that at least a few items bought go over the estimated cost, you will buyout as many commodities that were below the estimated cost, the remaining gold will be refunded to you, and you will be disconnected in most cases.

Monday, December 10, 2012

Diablo 3: 60 and Climbing


Defeating Diablo might mean beating the game to some, and even more to people who hit 60, but it's far from over.

3 Week Gold Challenge: Raise as much money as possible (by this, meaning actual cash as well as gold) via equipment and commodity sales as well as loot drops in three weeks. 1 dollar will covert to 3.4 million gold based on current conversion rates.

There was almost no way to do something like this after one playthrough, so the last week was spent bringing up a character to lvl 60.

Notes:

  • The campaign can by any means be called 'short' - it takes approximately 8-10 hours to complete at MP-2 if you're just completing the main objectives. (Note: There are achievements for completing each Act in less than 1 hour.)
  • Leveling up here is quite quick (approximating 30 minutes with the proper skills, up to lvl 50, at which point you need to be on Hell difficulty to level up effectively)
  • MP-2 is quite manageable with normal gear, after that point you should overgear via auction house.
  • Was xp farming at the rate of 740k EXP / hour on Nightmare difficulty. and approx 2.75M xp/hr peak at Hell.

Current Strat I'm Using:

Note: It might not be the most effective, but works for me.

  • Start game in normal mode (no MP), go up to lvl 10 or something.
  • Accumulate enough gold to overgear via auction house (using Flawless Square gems for sockets)
  • Play at MP-5, adjusting as necessary to get though the game by Lvl 30 or so. (If I'm doing a lot of overkill on enemies, MP is raised). Reduced to Normal after hitting 50 before Hell dif, and back up to MP-2 onwards.
  • Accumulate as many subtle essence via blacksmith (by breaking it down) and sell via auction house (this sells for around 700 each at time of writing, far more than selling inferior magic items alone. If it's rare and has good stats, sell via AH.)
  • My Barbarian Build for XP: here (Prior to inferno)
    • 1. Frenzy + Sidearm to build up rage quickly (and has high dps, with Sidearm more so)
    • 2. Rend + Ravage - used to take out standard mobs quickly. Note its total damage is 700% weapon dmg over 5 seconds, and MP level as well and dps was prioritized so it can take out common mobs on its own.
    • 3. Sprint + Marathon - to get from one enemy to the next faster.
    • 4. Revenge + Vengeance - to build up fury + regen health faster between mobs
    • 5. Battle Rage + Maurader's Rage for the dmg bonus. (Latter swapped with War Cry in Inferno)
    • 6. Ignore Pain + Ignorance is Bliss, since damage taken is quite high in some places.
    • Passives to increase atk, def, and regens rage.

Results:

The challenge concluded on January 6, 2013, raising over 110 million gold in the process, and not killing a single creature in the last week, relying entirely on gem and item flipping. The most successful sale was Depth Diggers (bought at 12M, sold at 36M - 9.99 USD before fees and converted.)

Thursday, November 15, 2012

LOOT: The Guide


The only difference between an easy game and Nintendo Hard is the quality of your loot.

This guide covers LOOT The Game on Armor Games. As in, I don't know what came first - was there an animation or something?

Objective: Get to the front of the train and take out Wooly. You have to attack the train cars (as well as turrets) in order to advance. Did I forget to mention, survive? Pick up loot and upgrade your elephant (must be dragged quickly in realtime).

Strategy: Three types of weapons are present in this game (looks not matter much):

  • Swords deal large amounts of damage up front, but you need to get within melee range. Effective against blue shields.
  • Guns have constant dps and hits their target instantly. Effective against orange shields.
  • Wands do burst damage and fire off tons of projectiles but they take a while to reach its target. Effective against green shields.

Loot can increase any of these attributes (the higher quality an item is the more attributes it has):

  • Damage controls how much base dps that weapon can do. You'll obviously want a weapon with higher dps.
  • Armor reduces the damage you would normally take. An elephant with 200 armor will reduce incoming damage by 200. This is effective for survival early on, but gets useless later.
  • Strength increases sword damage by a percentage.
  • Dexterity increases gun damage by a percentage.
  • Intelligence increases wand damage by a percentage.
  • Health increases overall health by a percentage. It is mandatory to have at least two decent pieces of equipment that increases this attribute. Without any bonuses, launchers will one shot you late game (and they're almost undodgable with eight of them onscreen)
  • Gold Drops increases how much gold appears. It's used for item slots (as if you need them) and especially quick healing.
  • Rare Item Drops increases the frequency and quality of rare items. Your goal is to get the most legendary items equipped.

You'll want to focus on dodging stuff while getting items that have upgrades in this order: Rare Drops, Dexterity (or STR or INT, depending on what weapon you have equipped) - this is VERY IMPORTANT for high dps, Health, and then a Weapon Upgrade. Once properly upgraded you can take down cars in a matter of seconds. Get going. A playthrough can be seen using this link.

Monday, November 12, 2012

Arkandian Explorer: Through the Unfinished Dungeon


So many floors, even this map is unfinished.

A playthrough of Arkandian Explorer shows a few new challenges and a few additional features, however most of the game mechanics remain the same from the previous game.

Things changed:

  • Sockets available on some items, either find gems or use Disenchanters to get them off items (more likely to drop the more you use it, and increases Mysticism still as well)
  • New armor/weapons to craft. (Potions, however, remain the same) Don't worry about limited resources, you can buy them now.
  • Auto-attack buttons
  • Additional repeatable dungeons to unlock additional crafting blueprints and spells. (the Mapping spell was never found)
  • Wall/furniture for house not buyable - you need to take them from exploring dungeons.

Note the following:

  • Repeatable dungeons can only be repeated a finite amount of times, with the exception of the Unfinished Dungeon and prison (the latter being more expensive).
  • The campaign maps usually use this set of random maps as well.
  • If there is a quest chest (grey), the mission will end once you leave - use that to your advantage, especially with the Alchemist's dungeon - the last 10 unlocks (bottom row) are only hair dyes, so you can loot for stuff there without collecting the quest chest repeatedly and you're good.
  • Custom Shoes can be used to boost bargaining skill, with at most 20 gold per chance to raise it.
  • Artistry and Salvaging can be rapidly increased by using one item and crafting repeatedly. (this is actually explained in the tips)
  • Use sneak on Vault 13 (get mana potions if you need to) to get past enemies, and sledgehammers to get to chests easier. You may need two trips.
  • The Mapping spell can't be found anywhere (at least not in any tactical battles or quests) and as a result you can't use it.
  • The last alchemy recipe can't be unlocked on its own - it is called 'Exclusive Hair Dye' and you must guess it. Hint: Pink Hair Dye from Revenant.
  • The Unfinished Dungeon stops at 100 floors and has a quest chest there - it's 1GP.

Crafting Recipes: Download JPG (2.25 MB). Due to popular demand for this, I have decided to put this up. Regardless of whether or not the craft is successful, it will be saved in your recipes list for later use.

Unfinished: Due to having a lot of jobs queued up, the image was released before I perfected it - the image will be updated and made neater when I get the time to do it.

Friday, September 7, 2012

Kroakatoa Island Approaching


The relaunch of Zuma Blitz, aka Kroakatoa Island. Even before the island was officially launched, it has been universally criticized by users of the old Zuma Blitz (with less than 10% approval rating for the past five posts on the ZB page), to the point where even I don't know why half the people are complaining and want to leave the island already. (Could someone give me an explanation?)

Conversion not right? Submit a receipt - click the "Receipt" button after transferring (before you play your first game) and print screen, upload to imgur, post the image link on comments. You should have a picture like this one.

Not enough coins per level? Get up to level 50+ and if you still think the same way, feel free to comment.

Idols not worth enough? $70 -> 3750 idols -> 4.7 million coins. It costs $97.50 on the new island for 5 million coins.

Not scoring high as before? They changed the gap mechanics a bit, favoring extremely large gaps over small ones. Example video of this

Something else? Leave it in the comments below.

Migration Info

All players are being migrated to the new island - read the below info to make sure you've got enough coins with you when you finally transfer, or jump straight to the new island. Remember: Once you depart, you cannot return back. (Even if you managed to do that, they will eventually remove game files needed to play the classic version, and your scores won't be saved.)

Noted Features (updated Sept 23, 2012)

This is only a brief list of important changes. The full list of observed changes on the new island can be found here.

  • Using new currency: Coins. Your mojo and idols from the previous version will transfer over to the new island as coins, however your level will not. You will get a one-time bonus for transferring based on your current level.

    If you wish to purchase additional mojo before moving to the new island, do so now - there are many players cashing out their large sums of mojo and idols on the new island, and they had to raise their prices there as a result. If 90 game 3x mojo potions are still offered at 32 idols, trade all your idols into them right now, as they give you a lot more coins for doing this when you transfer than with just idols.

  • If you had an higher tier power unlocked when you transfer it will still be available for use without having to level up first.
  • Fortune cookies will not carry over, so open them all prior to the relaunch. You can, however, send a bundle of coins to each friend per day in the near future. Any feeds clicked on for mojo posts on the old island are awarded to you as coins.
  • Treasure chests in the new island will instead give you an extra daily spin. Don't count on your luck, though; at the time of writing, the daily spins collected in-game is rigged to give you zero chance of any payout above 10k.
  • You can send lives to friends, at a rate of one every twelve hours. Number of coconuts collected on the island will determine the number of extra reserve lives.
  • Lives and XP potions are buyable using coins. Unlimited play for a set time, however, requires actual cash.
  • An additional food items can be used on a frog at a time to give it extra effects, in addition to three powers, and either increase the potency of a power or provide an extra benefit that powers or spirit animals can't get you. Effects can range from increasing the radius of hot frog explosions to increasing the score of gap shots.
  • You can buy powers in bulk at a price par to that of Classic Zuma Blitz.
  • Spirit Animals can be used multiple times in a row with a slight reduction in cost for each successive use. Their appearance will change slightly compared to Classic Zuma Blitz.
  • New spirit animals: Dire Wolf, Pegasus, Gryphon, Dragon, Giant Squid, designed for hardcore players. They are awarded at 2.5M, 3M, 3.5M, 4M, and 4.5M respectively. All spirit animals are available from the start, so you don't need to worry about not getting one due to a low level.
  • New HUD - all your stats are on the bottom (with no indicator on how much your fruit is worth), and game boards now have a larger widescreen aspect ratio, which allows room for more elaborate curve designs.
  • You will level up much quicker compared to the old island at the same level, BUT (at this time) you will not earn coins at the end of a game, only when you level up. Although this problem is very noticeable at low levels for players who transferred because high-level powers are being used, it should be of little concern by the time you reach the level you're normally supposed to unlock them (at lvl 105) since you're practically getting over 100k coins per level.
  • Your XP is primarily based on the number of techniques you pull off in the game - hot frog, curve clears, gap shots, and fruit all give you additional XP at the end of each game. Simply clearing a large amount of balls or getting a lot of points makes no difference in XP gained.
  • This version has an interesting bug in which it's possible to get time and multiplier balls well after they disappear. If such a powerup disappears on a ball just match that ball at your leisure and the multiplier/time bonus will be added.
  • Gap mechanics changed: Double tapping can no longer be used to get maximum points on your double gap. However, two ball gaps will.

Transfer Rates:

Popular belief says that you have to be lvl 80 before you transfer. You can technically go at any level, you'll just miss out on a few bonuses and will have to level back up again to get those power upgrades that you didn't earn on the old island.

  • Amount of Mojo is the number of coins you will receive, plus 50%.
  • 1 idol -> 1250 coins
  • 3x mojo potion (for each game) -> 1300 coins
  • Mastery level will give you a permanent sticker on your stats page, as well as some drinks (buffs)
  • Extra coins equal to 20% of the above total - but only if you got to level 80 or went through mastery.

Bonuses based on transfer level:

  • Lvl 10 - Bomb powerup x20
  • Lvl 20 - 375k coins (if you are less than level 80 this bonus is reduced)
  • Lvl 30 - 25x life
  • Lvl 40 - 24hr 2x XP potion
  • Lvl 50 - Cannon powerup x20
  • Lvl 60 - 24hr life

Related Resources

Wednesday, August 22, 2012

Supreme Commander: Forged Alliance Speedruns

Supreme Commander: Forged Alliance is an old RTS game (more specifically, around five years) that's still quite distinctive in terms of strategy - no fixed resources, extremely large maps, strategic zoom, etc. Its system requirements are pretty steep - even a modern midrange graphics card will have some difficulties running smoothly. (While a laptop ran vanilla SupCom just fine, the expansion was unplayable).

After seeing a speedrun of one (and only one) level of Supreme Commander 2, a question remains: Why aren't there any speedruns of other maps? Because they take too long? Probably.

(I later discovered the answer behind the lack of speedruns: The campaign for SupCom Vanilla placed a bunch of unit restrictions in early levels leaving only a few ways to complete each mission, while SupCom 2 has more scripted sequences and fewer ways to get mass / energy faster.) While levels in the sequel are short to the point where many of them are beatable within a half hour or less, typically a single level in FA spans several youtube videos.)

These runs focus less on cheese strats and more towards both efficiency and macro - anyone can build up a large enough force over time and overpower the enemy, but can you accomplish all your goals within an hour?

Enter my first FA Speedrun, which involves completing each map and all secondary objectives as quickly as possible. By quickly, meaning one map in as fast as 48 minutes. (To compare, other normal playthroughs take around two hours to finish.)

Notes

  • The retail version of the game (build 3596) was used. Newer versions might break some of the strats used in the videos, especially mission 4.
  • Intro Briefings are skipped.
  • No separate 'parts', meaning each map is done in one take, in one video.
  • All videos here were played at Normal difficulty. Trying any map on hard would involve lots more time than you might expect in order to get a good defense up first.
  • Goal time is under 1 game hour for each op.
  • What and how much the enemy sends at you is based on what you have built (aka dynamic difficulty). If you have ground experimentals, they send T3 bombers (sometimes from off the map) at you to deal with them, so unless you have air superiority... (note: this occurs when the map expands, so you can safely build after.)

Videos

Individual Level Notes

Mission 1:

  • Started as UEF (and for the rest of the campaign) given that there's a lot of half-built material here. For each map, I do a general Perceval/Flak Artillery/Gunship/ASF/SACU combo.
  • A huge amount of T1s building mass storage, and shields / air defense per mass extractor (mex). 54 mass might not be much given the huge starting production you have at the beginning (148 mass/s), but at least you can generate more mass with those T1 engineers right off the bat while you're upgrading your stuff to T3, plus you have more mass at your reserve.
  • Sent several SACUs for proxy factory building using Fatboys (produce units at 3x the rate of a normal T3 factory) while existing Percevals are destroying the bases in the next phase. ASFs are used to counter the strategic bombers coming in the next phase.
  • There is a optional objective involving saving a nearby town, you can use gunships to pick off the boats. And then you need to escort the evac trucks to the nearest base. It's easier when Seraphim is revealed but a nuke is launched regardless whether or not the trucks were out. It's entirely possible to destroy the nearby boats completing that objective, the nuke hits taking out half the buildings, and moving the trucks that pop out to the base without any defense whatsoever.

Mission 2:

  • Micromanagement was needeed with reclaiming spare mass with engineers, power generators to give just enough power to upgrade to build T2 power plants, and building mexs / powerplants until capable of reaching T3. Upgrading mex surrounded by mass storage for a total of 27 mass/sec per extractor. Note: mex T3 upgrade costs 1800 mass, but only in the campaign - it will never be this cheap in a real skirmish / multiplayer match.
  • Destroy ally's mex and replace it with your own. This was more or less unnecessary given spare mass deposits, although it's justifiable becuase they're in a more defended position.
  • You can use transports to skip the pass completely and drop forces / SCU to capture, but you need that path clear of enemy air forces.

Mission 3:

  • Though more expensive, Two Atlantises are better in the long run and produces stuff faster than finding 12 engineers to assist an air factory. Only thing you need to worry about is mass producing T3 gunships.
  • Worked with production of four battleships as fast as possible, as well as an assortment of destroyers and cruisers (which counter air and sub attacks). Four's sufficient to destroy the first base and punch through heavy shielding to destroy the engineers that construct experimental bombers, with spy planes acting as spotters to where to (manually) aim the cannons.
  • Other strat guides suggest gunships or ground units, so why use ships? One, ground (submersible) units are too slow and no real protection from naval units. Two, experimental bombers explode when either it or the engineer building them is lost, that's to be expected, but keep in mind this also damages air units and in previous runs it had no problem destroying my 80ish T3 Gunships that were stacked and aiming that one engineer (and I still had several more to go).
  • 50 T3 gunships alone is enough to take on both commanders, the bottom one will eventually go under water to protect itself when damaged, but you can destroy it force it to teleport if you're fast enough.

Mission 4:

  • The first push should occur when you have several SACUs with the resource upgrade, and enough Percevals / anti-air to plow through the first and second phases without delay.
  • Bring the ACU and several SACUs with you along with the rest of the units to the ledge where you destroyed the Quantum Jammer - you can establish several layers of shields there with the SACU's resource generation and hold off light attacks as the Seraphim are too dumb to send their massive forces to locations other than your starting location.
  • According the game script, you're supposed to stay within your starting location, apparently you aren't required to do this, you just need to survive the timer.

Mission 5:

  • This is the only mission where there are no starting debris for extra mass.
  • Needed just enough power in order to capture buildings (and a turret to hold off engineers) while the Commander proceeds with the rescue and captures the nearby plant and places mass storage to store any excess mass accumulated while walking to capture / build new mexs to avoid unnecessary wait times. (The starting base is at this point expendable). It gives you more initial mass and power boosts as well as access to T3 immediately five minutes in the game.
  • SAM sites first, then engineering facilities once the coast is clear. They're faster than T3 engineers, but if there's ASF's, they'll destroy them (and can break any shields that happen to get in their way quite easily). This eventually leads to a T3 gunship per 15-20 seconds. (To put it in perspective, it takes 2m 30s to build one unassisted)
  • Don't establish mexs at the west firebase - nice mass boost, but it's too difficult to defend against gunships.
  • You can use 25 gunships to destroy Hex5's base and ACU, provided you get them on the far right edge of the map and move south. You also need spy planes to see through the cloak field.
  • Upcoming ASFs are used to defend Brackman as he makes his way north. Don't take a straight line there - head to the east and then north.
  • I was lucky that (1) Soul Rippers didn't intercept him, and that (2) Fletcher survived the attack (due to Hex5's early defeat he is typically not well enough prepared to fend off attcks, let alone two experimentals)

Mission 6 (updated):

  • Built a quantum gateway in order to produce SACUs for the battle ahead.
  • To build experimentals quickly, you simply need to supply the power, and one SACU collects from experimentals debris, while building experimentals of your own. You still need the anti-air.
  • Need two Czars to eliminate both Arnold / Victoria and advance to the next stage. If both are defeated at the same time only one cutscene plays.
  • GC's built after Quantum Rift is seen, otherwise three Strategic bombers appear for each GC (whether alive or partially built), which is painful without huge amounts of anti-air.
  • You'll need five GC's to destroy the quantum gate, and more if you're going to take out the ACU to complete the secondary objective. The backup was necessary since one of the GC's consistently missed the ACU.
  • It is also possible to mass Czars (the enemy doesn't send enough ASF's to be considered a major threat) and send them towards the gate, ending up with a completion time of around 27 minutes.